How to install the custom finishes, and please with some care.
Warning, so please note: When using a screwdriver to install the screws on the new custom finishes, you need to be very careful of how you use the screwdriver as you could chip off the finish on the screws and the knockout plugs.
Please put some masking-type tape on the screwdriver flathead to install the screws and the plugs so as not to chip off the new finish. This is very important, and please no electric screwdrivers. So, please take your time and take gentle care when installing the covers.
Please read our policy for refinishing floor box covers
Thank you for your interest in refinishing your floor box cover in one of our Arnev Products, Inc. custom finishes. For the protection of your cover, we ask that you follow these instructions.
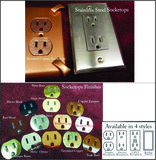
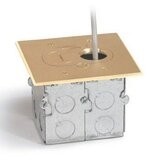
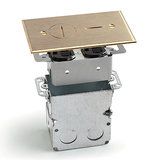
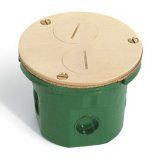
1. We ask that you send the COVERS ONLY. Floor box covers generally come lacquer coated. To refinish the floor box covers, the lacquer must be removed, and this is done by soaking the covers in a strong chemical. Any non-metallic parts that may be attached to the cover, including gaskets or electrical devices, receptacles, low voltage housings, etc., will be dissolved with the lacquer as well. This is why we insist that only floor box covers be sent for refinishing. If the cover or receptacle cannot be removed from the floor box, we cannot soak off the lacquer and refinish the cover. Any threaded area on the floor box cover, like screwed-out plugs, so these are taped off and do not have a custom finish on the threaded area, as they may not screw back in properly. Also, no plastic-type covers are accepted. We are NOT responsible for the box itself, gaskets, or devices, so please keep all the other parts to the assembly, take off the cover, and send only the cover.
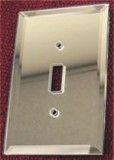
2. Please package any exterior screws (screws that will be visible after the box is installed) with the cover so these can be finished to match the box. Make sure they are secure so they don't get lost or scratch the cover in transit.
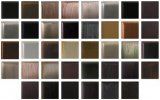
3. Custom colors are run in batches. Consequently, the finishing time can vary depending on the schedule for the batch of the custom color you have chosen. However, as we need only the cover, the floor box itself can be installed by your electrician to maintain your building or remodeling schedule.
4. You have been advised by one of our customer service representatives that the custom finishes are approved for LOW TRAFFIC AREAS ONLY. Should you decide to install the floor boxes with our finishes in HIGH TRAFFIC AREAS, any finishing 1-year limited warranty is void. In addition, if you should decide to apply any protective finish (lacquer, polyurethane, etc.) OVER our custom finish, the finishing 1-year limited warranty is void. Also, we cannot be responsible for these being installed in the middle of a construction site. When these trims get installed, the contractor covers them with plastic or removes them until the project is completed, and then installs the covers and rings when the flooring is complete and dried or cured. We are not responsible for taping them knowing they were subjected to the fresh chemicals. The finishing rings are also not intended to be fastened to the wet concrete, but to lay on top of cured concrete and held down with adhesive caulk. Once again, our finishing rings are also not intended for high-traffic areas, and that includes construction zones.
5. If you approve the enclosed sample and agree to the instructions above, please sign and return the top portion of this page. You may keep the bottom portion for your records.
If you follow these instructions, we are confident that you will love your custom floor box covers and enjoy them for years to come.
I approve of sample number______________________________ and agree to these instructions.
X________________________________________________________________________________________________