Customer service: 800-260-1181
After hours: 847-220-0396 till 6 PM Central time
After hours: 847-220-0396 till 6 PM Central time
Monday-Thursday 9 AM to 5 PM Central time, Fridays 9 AM to 4 PM Central time.
- Configurations
- All Switch Plate Cover Products
- All Switch Plate Cover Products
- Painted Switch Plates
- Metal Switch Plates
- Glass Switch Plates
- Custom Designs
- Punched Border Designs
- Punched Star Designs
- Punched Hearts Designs
- Simulated Stone
- Southwest Designs
- Blank Switch Plates
- Metal Switch Plate Collection
- Despard Switch Plates in single sizes only.
- Socketops "Peel & Stick" for Electrical Switches
- Glass & Acrylic
- All Glass, Mirrored, Acrylic and Accessories products
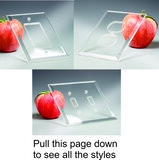
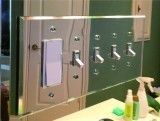
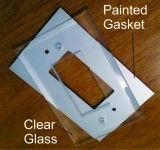
- Clear Real Glass Switch Plates
- Mirrored Real Glass Switch Plates
- Frosted Real Glass Switch Plates
- Gray Real Glass Switch Plates
- Acrylic Mirrored Glass Switch Plates
- Screwgard Gaskets for Clear Glass
- Color Templates for Clear Glass
- Color Template Samples for Clear Glass
- All Glass Products
- Mirrored Vent Covers (FLAT)
- Mirrored Vent Covers (ADJUSTABLE)
- Wood
- Floor Boxes
- Floor Boxes and Accessories for Wood and Concrete
- Floor Boxes for Wood Floors
- Floor Boxes for Concrete and Covers
- Flush Mount Floor Boxes and Covers
- Covers Only - Carpet Flanges - PVC Covers
- Nozzels & Tombstone Boxes and Covers
- Outdoor Waterproof Floor Boxes for Concrete or Wood Decks and Porches
- Goof-Rings (Brass-Aluminum-Nickel Silver Finishes)
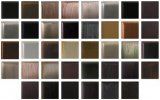
- Custom Floor Box Cover Finishes (38 finishes)
- Custom Finishes Sample Chips
- Countertop Pop-Up Waterproof Box
- Kitchen Countertop Pop-Up Boxes
- Poke-Through Floor Boxes (Canadian Made)
- Audio-Video Floor Boxes (Wood & Concrete Floors USA MADE)
- Audio-Video Connectors for our AV Boxes
- Audio-Video Snap-in Connectors
- CAT5 & CAT6 Snap-Ins
- Plastic PFC Covers & Flip lids
- Round and Rectangular Plastic Boxes with Brass Covers
- Carlon Boxes and Covers
- NEW Round Screw Plugs many sizes
- Cabinet Hardware
- Electrical
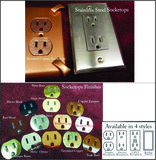
- STAINLESS STEEL LAMINATE RECEPATCLES
- RECEPTACLES IN BLACK-BROWN-GRAY
- DIMMERS IN BLACK-BROWN-GRAY
- RECEPTACLES WITH USB CHARGING JACKS
- SOCKETOPS-SWITCHGARDS-DRYER VERT COVER PLATES
- TEL, CAT5, CAT6 SNAP-INS, HDMI, DVI, QUICKPORT HOUSINGS FOR SWITCH PLATES
- TAMPER RESISTANT IN BLACK RECEPTACLES
- Materials
- Contact us
- Light Switch Plate Covers
- Clear Glass, Mirrored, Frosted, Acrylic Switch Plates & More
- Real Glass Mirrored Switch plates